Homemade Apple Pastilles
Looking for a delicious and healthy snack that you can easily make at home? Homemade apple pastilles are the perfect treat for you!
Not only are they sweet and chewy, but they're also free from artificial ingredients found in store-bought gummies.
This step-by-step guide will show you how to turn fresh apples into a fun, guilt-free snack your whole family will love.
Ingredients
To get started, gather these simple ingredients:
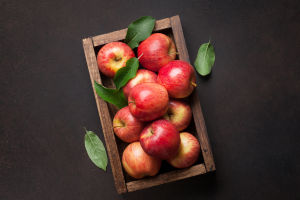
3 large apples (choose a sweet variety like Fuji or Gala)
1 cup of water
2 tablespoons of lemon juice
1/4 cup of honey (or maple syrup)
2 tablespoons of gelatin powder (unflavored)
Step 1: Prepare the Apples
Begin by washing and peeling the apples. Remove the cores and chop them into small chunks. You'll need around 2 cups of apple chunks for this recipe. Apples are the base flavor of the gummies, so make sure to use fresh and juicy ones for the best taste.
Step 2: Cook the Apple Mixture
Combine the apple chunks, water, and lemon juice in a medium-sized saucepan. Lemon juice helps preserve the apples' color and adds a slight tang to balance the sweetness. Bring the mixture to a boil over medium heat, then reduce the heat and let it simmer for about 15 minutes until the apples are soft and tender.
Step 3: Blend into a Smooth Puree
Once the apples are fully cooked, transfer the mixture into a blender or use an immersion blender directly in the pot. Blend until you get a smooth puree. If you prefer your gummies a bit chunkier, you can leave a few small apple pieces intact. Taste the puree to see if it needs a touch more sweetness. If so, add an extra tablespoon of honey.
Step 4: Mix in the Gelatin
Pour the puree back into the pot and set it on low heat. Gradually sprinkle the gelatin powder over the puree, stirring constantly to prevent clumping. Gelatin is what gives the gummies their chewy texture, so be sure to mix well until it is completely dissolved. This step should take about 2-3 minutes.
Step 5: Sweeten to Taste
Add the honey (or maple syrup) to the puree and stir until fully incorporated. Adjust the sweetness to your liking. You can skip the honey or add less for a more tart flavor. For sweeter gummies, increase the amount of honey by a tablespoon or two. Keep in mind that the sweetness will become slightly milder once the gummies are set.
Step 6: Pour into Molds
Remove the mixture from heat and let it cool for a minute. Carefully pour the apple mixture into silicone molds of your choice. If you don't have molds, you can also spread the mixture evenly onto a lined baking sheet and cut it into bite-sized pieces later. Let the molds sit at room temperature for a few minutes to cool down before placing them in the fridge.
Apple pastille
Video by Канал рецептов
Step 7: Chill and Set
Place the molds in the refrigerator and let them chill for at least 2 hours. This gives the gummies time to firm up. Once set, gently pop the gummies out of the molds. If you used a baking sheet, slice the gummies into small squares or shapes using a spatula or kitchen scissors.
Step 8: Store and Enjoy
Store your homemade apple gummies in an airtight container in the refrigerator for up to two weeks. Enjoy them as a quick snack, add them to lunchboxes, or use them as a natural treat for kids and adults alike!
Tips and Variations
- Add spices: For a fall-inspired treat, sprinkle a pinch of cinnamon, nutmeg, or ginger into the apple puree.
- Use different fruits: Mix in other fruits like berries or peaches for unique flavors.
- Vegan option: Swap gelatin for agar-agar to make a plant-based version.
Health Benefits
Homemade apple gummies are not only delicious but also packed with vitamins and minerals. Apples are rich in fiber and vitamin C, and by making them at home, you're avoiding the artificial colors and preservatives often found in store-bought varieties.
Making your own apple gummies is a fun and rewarding kitchen project that results in a tasty and nutritious snack. Whether you're looking for a new way to enjoy apples or need a healthy treat for your family, these gummies are sure to hit the spot!


